小程序是一种新的开放能力,开发者可以快速地开发一个小程序。小程序可以在微信内被便捷地获取和传播,同时具有出色的使用体验。

目录结构
- page — 项目所有的页面模板
- utils — 公共js工具
- app.js — 启动入口文件
- app.wxss — 项目的全局样式文件
- app.json — 项目的配置文件
在app.json里我们可以看到page下面就是我们可以配置的页面路径,pages/index/index这个路径就可以访问index.wxml下的东西,每一个页面都有“三大件”—js、wxml、wxss组成。

下面开始我们小栗子:
新增一个view,wxml与wxss就是我们的HTML和css,需要增加和修改样式的话就直接修改就好了。
1 | <!--index.wxml--> |
1 | /**index.wxss**/ |
保存好就可以看到效果了。
接下来我们试一下动态改变内容,先来介绍下js文件下的一些函数模块是什么意思:1
2
3
4
5
6
7
8
9
10
11
12
13
14
15
16
17
18
19
20
21
22
23
24
25
26
27
28
29
30
31
32
33
34
35
36
37
38
39
40
41
42
43
44
45
46
47
48
49
50
51
52
53
54//index.js
//获取应用实例
const app = getApp()
Page({
data: { // 当前页面的所有数据
motto: '我们的第一个小程序。',
userInfo: {},
hasUserInfo: false,
canIUse: wx.canIUse('button.open-type.getUserInfo')
},
//事件处理函数
bindViewTap: function() {
wx.navigateTo({ // 页面跳转函数
url: '../logs/logs'
})
},
onLoad: function () { // 加载页面时触发函数集合
if (app.globalData.userInfo) {
this.setData({
userInfo: app.globalData.userInfo,
hasUserInfo: true
})
} else if (this.data.canIUse){
// 由于 getUserInfo 是网络请求,可能会在 Page.onLoad 之后才返回
// 所以此处加入 callback 以防止这种情况
app.userInfoReadyCallback = res => {
this.setData({
userInfo: res.userInfo,
hasUserInfo: true
})
}
} else {
// 在没有 open-type=getUserInfo 版本的兼容处理
wx.getUserInfo({
success: res => {
app.globalData.userInfo = res.userInfo
this.setData({
userInfo: res.userInfo,
hasUserInfo: true
})
}
})
}
},
getUserInfo: function(e) { //获取用户信息
console.log(e)
app.globalData.userInfo = e.detail.userInfo
this.setData({
userInfo: e.detail.userInfo,
hasUserInfo: true
})
}
})
具体函数对应含义也可以参考微信公众平台开发。
先去wxml文件下增加一个按<button class='primary' bindtap='changeDemo'>点击改变状态</button>,接着去js文件下添加初始数据,和点击的事件函数。1
2
3
4
5
6
7
8
9
10
11
12
13
14
15
16
17
18<!--index.wxml-->
<view class="container">
<view class="userinfo">
<button wx:if="{{!hasUserInfo && canIUse}}" open-type="getUserInfo" bindgetuserinfo="getUserInfo"> 获取头像昵称 </button>
<block wx:else>
<image bindtap="bindViewTap" class="userinfo-avatar" src="{{userInfo.avatarUrl}}" background-size="cover"></image>
<text class="userinfo-nickname">{{userInfo.nickName}}</text>
</block>
</view>
<view class="usermotto">
<text class="user-motto">{{motto}}</text>
</view>
<view>
<text class="demo">{{demotext}}</text>
</view>
<button class='primary' bindtap='changeDemo'>点击改变状态</button>
</view>
1 | //index.js |
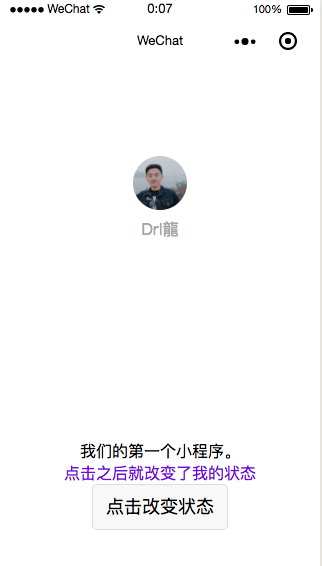
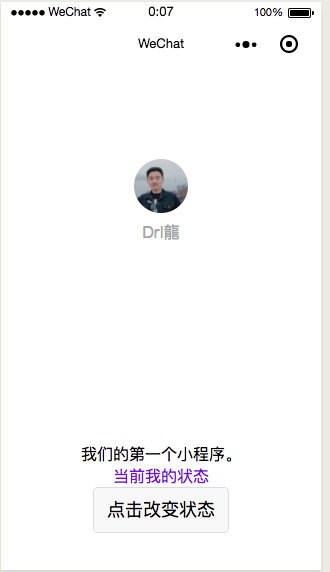
在wxml文件里加入if-else的判断:1
2
3
4
5
6
7
8
9
10
11
12
13
14
15
16
17
18
19<!--index.wxml-->
<view class="container">
<view class="userinfo">
<button wx:if="{{!hasUserInfo && canIUse}}" open-type="getUserInfo" bindgetuserinfo="getUserInfo"> 获取头像昵称 </button>
<block wx:else>
<image bindtap="bindViewTap" class="userinfo-avatar" src="{{userInfo.avatarUrl}}" background-size="cover"></image>
<text class="userinfo-nickname">{{userInfo.nickName}}</text>
</block>
</view>
<view class="usermotto">
<text class="user-motto">{{motto}}</text>
</view>
<view>
<text wx:if="{{demotext=='当前我的状态'}}" class="demo">{{demotext}}</text>
<text wx:else class="demo">{{demovalue}}</text>
</view>
<button class='primary' bindtap='changeDemo'>点击改变状态</button>
</view>
1 | // index.js |
接下来是for循环遍历数据:1
2
3
4
5
6
7
8
9
10
11
12
13
14
15
16
17
18
19
20
21<!--index.wxml-->
<view class="container">
<view class="userinfo">
<button wx:if="{{!hasUserInfo && canIUse}}" open-type="getUserInfo" bindgetuserinfo="getUserInfo"> 获取头像昵称 </button>
<block wx:else>
<image bindtap="bindViewTap" class="userinfo-avatar" src="{{userInfo.avatarUrl}}" background-size="cover"></image>
<text class="userinfo-nickname">{{userInfo.nickName}}</text>
</block>
</view>
<view class="usermotto">
<text class="user-motto">{{motto}}</text>
</view>
<view>
<text wx:if="{{demotext=='当前我的状态'}}" class="demo">{{demotext}}</text>
<text wx:else class="demo">{{demovalue}}</text>
</view>
<button class='primary' bindtap='changeDemo'>点击改变状态</button>
<view wx:for="{{fordata}}" wx:for-index="id" wx:for-item="itemvalue">
ID:{{id}}姓名:{{itemvalue.name}}----数量:{{itemvalue.num}}
</view>
</view>
1 | // index.js |
本地数据都没有问题了,那么接下来就是Ajax 跨域请求,在小程序里面我们不用考虑那么多,因为他们已经为我们封装了一套方法,我们只需要调用就好了,参考发起网络请求wx.request(OBJECT)
示例代码:1
2
3
4
5
6
7
8
9
10
11
12
13wx.request({
url: 'test.php', //仅为示例,并非真实的接口地址
data: {
x: '' ,
y: ''
},
header: {
'content-type': 'application/json' // 默认值
},
success: function(res) {
console.log(res.data)
}
})
最后我们来一个动态获取本地图片上传,使用文档提供的方法获取本地相册wx.chooseImage(OBJECT),在js文件里新增一个方法。1
2
3
4
5
6
7
8
9
10
11
12
13
14
15
16onLoad: function () { // 加载页面时触发函数集合
var that = this;
wx.chooseImage({ // 获取本地图片
count: 1, // 默认9
sizeType: ['original', 'compressed'], // 可以指定是原图还是压缩图,默认二者都有
sourceType: ['album', 'camera'], // 可以指定来源是相册还是相机,默认二者都有
success: function (res) {
// 返回选定照片的本地文件路径列表,tempFilePath可以作为img标签的src属性显示图片
var tempFilePaths = res.tempFilePaths
console.log(tempFilePaths)
that.setData({
demoImg: tempFilePaths
});
}
})
}
wxml文件:1
2
3
4
5
6
7
8
9
10
11
12
13
14
15
16
17
18
19
20
21
22<!--index.wxml-->
<view class="container">
<view class="userinfo">
<button wx:if="{{!hasUserInfo && canIUse}}" open-type="getUserInfo" bindgetuserinfo="getUserInfo"> 获取头像昵称 </button>
<block wx:else>
<image wx:if="{{demoImg!=null}}" src='{{demoImg}}'></image>
<image wx:else bindtap="bindViewTap" class="userinfo-avatar" src="{{userInfo.avatarUrl}}" background-size="cover"></image>
<text class="userinfo-nickname">{{userInfo.nickName}}</text>
</block>
</view>
<view class="usermotto">
<text class="user-motto">{{motto}}</text>
</view>
<view>
<text wx:if="{{demotext=='当前我的状态'}}" class="demo">{{demotext}}</text>
<text wx:else class="demo">{{demovalue}}</text>
</view>
<button class='primary' bindtap='changeDemo'>点击改变状态</button>
<view wx:key="id" wx:for="{{fordata}}" wx:for-index="id" wx:for-item="itemvalue">
ID:{{id}}姓名:{{itemvalue.name}}----数量:{{itemvalue.num}}
</view>
</view>
总结
这些都是简单的页面数据操作和获取,遇到真实场景需要特殊对待,接下就以实例为主。